In today’s fast-evolving artisan scene, mastering the right metalworking tools is more crucial than ever for creating truly standout pieces. Whether you’re a seasoned craftsperson or just starting out, having a solid toolkit can transform your creative process and elevate your work.

With new techniques and materials constantly emerging, staying updated on essential tools ensures your craft remains both relevant and innovative. I’ve personally found that investing time in understanding each tool’s purpose makes a world of difference in the final outcome.
Let’s dive into the must-have metalworking tools that every artisan should know to bring their stunning creations to life.
Unlocking Precision: Tools for Detailed Metalwork
Fine-Tip Soldering Irons for Intricate Joints
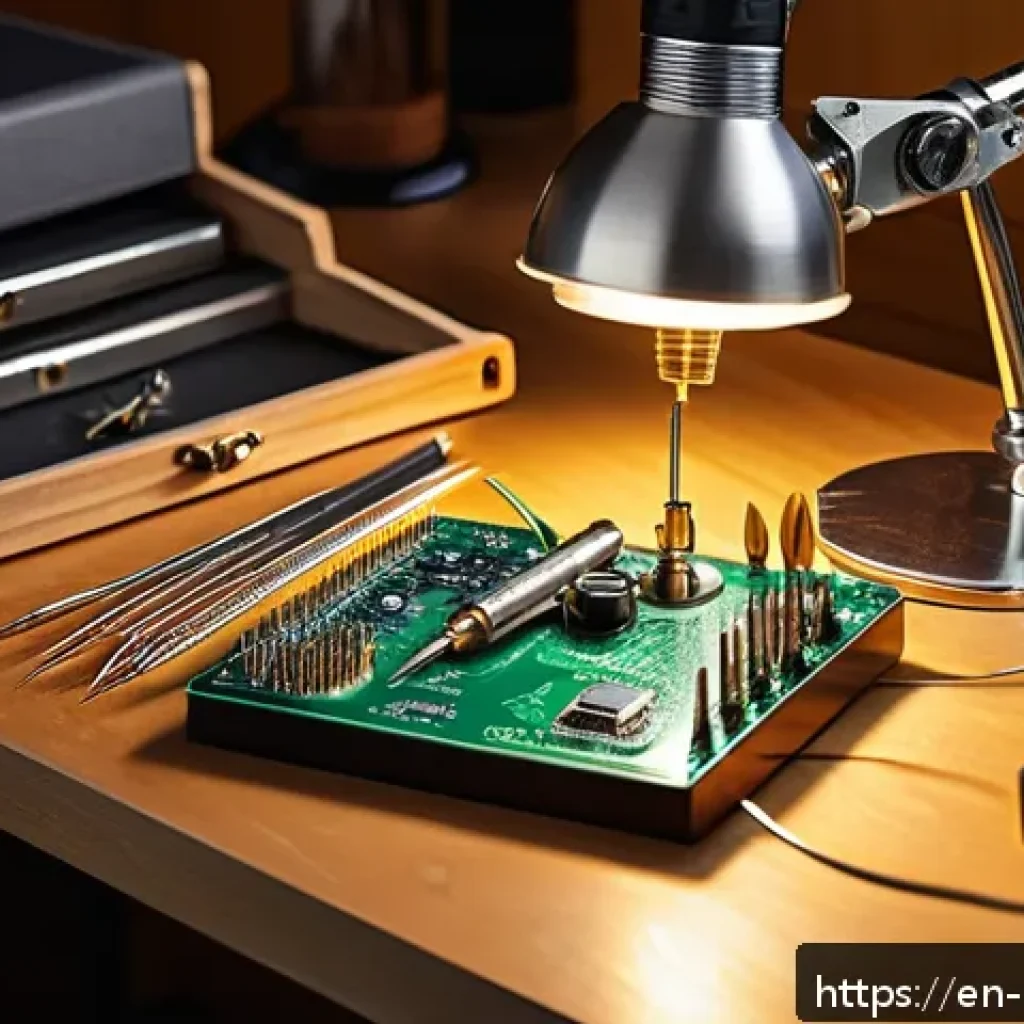
When you’re dealing with delicate metal pieces, especially in jewelry or small sculptures, a fine-tip soldering iron becomes your best friend. I’ve spent hours trying different tips, and nothing beats the control you get from a slim, pointed tip that heats quickly and holds temperature steadily.
It’s essential for crafting clean joints without melting surrounding parts. The key is to pair it with quality solder and flux; otherwise, even the best iron can leave you frustrated with blobs or weak bonds.
For those venturing into more complex designs, investing in a variable temperature soldering station is a game-changer—it allows you to adjust heat precisely depending on the metal type and thickness, reducing the risk of heat damage.
Needle Files for Shaping and Smoothing
Needle files are the quiet heroes in any metalworker’s kit. I remember how rough edges and tiny imperfections used to frustrate me until I discovered a set of fine, medium, and coarse needle files.
These allow you to carefully shape and smooth even the tiniest nooks and crannies, making your final piece look polished and professional. Working with different shapes—flat, round, triangular—gives you versatility in tackling everything from sharp corners to rounded grooves.
The tactile feedback you get while filing is invaluable; it helps you feel when the surface is just right, something machines can’t replicate easily.
Magnifying Work Lamps to Enhance Visibility
Good lighting isn’t just a luxury; it’s a necessity. When you’re focusing on minute details, I’ve found that a magnifying work lamp with adjustable brightness drastically reduces eye strain and mistakes.
Setting it up right above your workspace illuminates shadows and highlights textures, which is especially helpful when soldering or engraving. It’s also perfect for inspecting your work mid-process, so you can catch flaws before they become bigger problems.
The adjustable arm and rotating head make it easy to position the lamp exactly where you need it without disrupting your workflow.
Shaping and Cutting: Essential Tools for Metal Manipulation
High-Quality Tin Snips and Metal Shears
Cutting metal accurately is foundational, and nothing beats a solid pair of tin snips or metal shears for this task. Early on, I underestimated the importance of sharpness and ergonomics until I switched to heavy-duty snips with cushioned handles.
The difference in hand fatigue and cutting precision was night and day. It’s worth noting that there are different snip types—straight, left, and right cutting—each tailored for specific cutting directions, so having a set means you’re prepared for any curve or straight line.
Plus, regular sharpening keeps your cuts clean and your hands comfortable.
Bench Vises for Secure Work Holding
Trying to bend, hammer, or file metal without a sturdy vise is like trying to write with a pen that keeps slipping. I learned this the hard way when my workpiece shifted mid-hammer stroke, ruining an otherwise perfect bend.
A bench vise clamps your metal securely, giving you both hands free to work precisely. When selecting one, I recommend prioritizing those with swivel bases so you can rotate your piece without unclamping, saving time and effort.
Soft jaws or protective covers on the vise jaws also prevent marring your work, which is critical for visible surfaces.
Hammers and Mallets for Controlled Shaping
The hammer you choose can make or break your shaping process. I started with a basic ball-peen hammer but quickly added a rawhide mallet to my arsenal after realizing how much gentler it is on softer metals.
Ball-peen hammers are perfect for shaping and riveting, giving you the force needed to manipulate tough metals. In contrast, mallets offer controlled tapping without damaging the surface, ideal for delicate shaping or flattening.
Experimenting with different hammer weights and head sizes helped me find the perfect balance for various projects, reducing hand fatigue and improving precision.
Surface Finishing and Detailing: Tools to Perfect Your Craft
Rotary Tools with Multiple Attachments
Rotary tools have transformed how I finish and detail metal pieces. With an array of attachments like sanding drums, polishing wheels, and engraving bits, they’re incredibly versatile.
I particularly enjoy using them for quick cleanup of solder joints and adding intricate textures that elevate a piece’s visual interest. The variable speed control is crucial; running the tool too fast can overheat the metal or wear down bits prematurely.
Over time, I’ve learned to swap attachments mid-project to keep the workflow smooth and achieve different surface effects without switching tools.
Sandpaper and Abrasive Pads for Smooth Finishes
Don’t underestimate the power of good old sandpaper. After shaping, I always move through a range of grits—from coarse to ultra-fine—to achieve a flawless finish.
Abrasive pads complement this process, especially when dealing with curved or uneven surfaces where sandpaper might miss spots. I keep a small stash of wet/dry sandpapers handy for wet sanding, which not only reduces dust but also leaves a much smoother surface.
This step often feels tedious but trust me, it’s the secret behind that mirror-like polish everyone admires.
Polishing Compounds and Buffing Wheels
Bringing out the shine is where the magic happens. Polishing compounds paired with buffing wheels can turn a dull metal surface into a gleaming masterpiece.
I’ve experimented with various compounds—rouge, tripoli, and diamond paste—to match different metals and desired finishes. The trick is to start with a more abrasive compound and gradually move to finer ones, allowing the metal’s natural luster to emerge without scratching.
Using a bench grinder or a handheld buffer depends on the project size, but in either case, patience and steady hands make a huge difference.
Measuring and Layout: Precision Starts Here
Calipers for Accurate Dimensions
If there’s one tool I consider indispensable for precision, it’s the caliper. Whether digital or dial, calipers give you accurate measurements down to the hundredth of a millimeter, which is vital when fitting parts or ensuring symmetry.
Early in my practice, I relied on rulers, but switching to calipers reduced errors dramatically. They’re also excellent for checking thicknesses and depths, allowing me to maintain consistency across multiple pieces.
Learning to read and use them effectively was a small investment of time that paid off immensely.
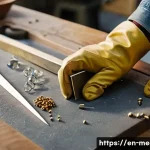
Marking Tools for Clear Guidelines
Marking metal before cutting or shaping can’t be overlooked. I prefer using scribing tools and permanent fine-tip markers depending on the metal’s surface and the type of work.
Scribes create thin, precise lines that don’t smudge during handling, which is essential for intricate layouts. On the other hand, markers are quick for rough guides or when working on darker metals where scratches may be hard to see.
I’ve found that combining both methods—marking major cuts with a marker and fine details with a scribe—streamlines the process and reduces mistakes.
Squares and Protractors for Angled Accuracy

Ensuring your angles are spot-on is fundamental, especially when fabricating parts that must fit together precisely. I rely on a combination square for quick 90-degree checks and an adjustable protractor when working with non-standard angles.
Having these tools on hand has saved me from countless misalignments and reworks. For metal sheets and components that require perfect edges and corners, a square is your best friend.
It’s one of those simple tools that can drastically improve the quality and professionalism of your finished piece.
Power Tools That Amplify Your Craft
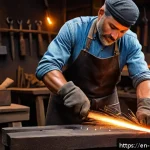
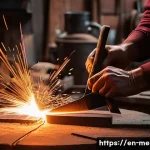
Angle Grinders for Heavy-Duty Cutting and Grinding
Nothing speeds up metal cutting and surface prep quite like an angle grinder. I use mine for everything from cutting thick sheet metal to removing rust and smoothing welds.
The key is to use the right disc—cutting wheels for slicing, flap discs for grinding, and wire brushes for cleaning. Angle grinders can be intimidating at first due to their power, but once you get comfortable, they become indispensable.
Just remember to wear proper safety gear; sparks and debris fly everywhere, and protection is non-negotiable.
Drill Presses for Consistent Hole Making
Handheld drills are handy, but for precise and repeatable drilling, a drill press is unmatched. I invested in a bench-top model that fits my workspace perfectly.
It allows me to drill holes perpendicular to the surface with consistent depth, which is crucial for assemblies. Adjustable speed settings accommodate different metal types and bit sizes, preventing overheating and ensuring clean holes.
If you frequently work with rivets or threaded inserts, this tool will save you hours of frustration and improve your craftsmanship’s quality.
Sheet Metal Brakes for Crisp Bends
When it comes to bending sheet metal cleanly and accurately, a sheet metal brake is a must-have. I didn’t realize how much easier my projects would become until I started using one.
It allows for controlled, straight bends without deforming the metal, something that hammering alone can’t achieve. Portable models are great for smaller sheets and hobbyists, while larger, stationary brakes are suited for extensive work.
The ability to set bend angles precisely saves time and produces consistent results, especially when creating boxes, panels, or decorative elements.
Comparing Essential Metalworking Tools
| Tool Type | Primary Use | Key Features | Recommended For |
|---|---|---|---|
| Fine-Tip Soldering Iron | Joining small metal parts | Variable temperature, quick heat-up, fine tip | Jewelry makers, electronics repair |
| Needle Files | Shaping and smoothing edges | Varied shapes, fine to coarse grit | Detail finishing, small scale work |
| Tin Snips | Cutting sheet metal | Ergonomic handles, multiple cutting directions | Sheet metal fabrication, hobbyists |
| Bench Vise | Holding workpieces securely | Swivel base, soft jaw covers | General metalworking, assembly |
| Rotary Tool | Detailing, polishing, engraving | Variable speed, multiple attachments | Fine finishing, creative detailing |
| Calipers | Measuring dimensions accurately | Digital or dial, precise to 0.01mm | Precision fitting, quality control |
| Angle Grinder | Cutting, grinding, surface prep | High power, interchangeable discs | Heavy-duty cutting, rust removal |
| Drill Press | Consistent, perpendicular drilling | Adjustable speed, depth stop | Assembly, repetitive drilling tasks |
Safety Gear: Protecting Your Most Valuable Asset
Eye Protection and Respirators
I can’t stress enough how important proper eye protection is. Flying sparks, metal shards, and dust can cause serious injuries. Over the years, I switched from basic safety glasses to wrap-around goggles and sometimes even full-face shields depending on the task.
Respirators are equally vital when grinding, sanding, or soldering to avoid inhaling harmful particles or fumes. I’ve found that investing in a comfortable, well-fitting respirator encourages me to wear it consistently without hassle.
Gloves Tailored for Metalwork
Not all gloves are created equal when it comes to metalworking. I prefer gloves that balance dexterity with protection—thin enough to feel the metal but thick enough to guard against cuts and burns.
Heat-resistant gloves are a must when soldering or using grinders, while heavy-duty leather gloves work great for handling rough or sharp materials. Finding the right pair took some trial and error, but now I never compromise safety for convenience.
Ear Protection and Proper Workwear
Metalworking can be noisy, especially when using power tools. Ear plugs or earmuffs reduce hearing damage and help maintain focus during long sessions.
Additionally, wearing non-flammable, snug-fitting clothing protects against sparks and prevents loose fabric from catching on machinery. Over time, I’ve adopted a safety-first mindset that keeps me working confidently and comfortably, which ultimately improves my productivity and quality of work.
Maintaining and Caring for Your Tools
Regular Cleaning and Lubrication
Keeping your tools in top shape extends their life and performance. I make it a habit to clean metal shavings, dust, and residues off my tools after every use.
Lubricating moving parts like vise screws or rotary tool collets prevents rust and ensures smooth operation. It’s a simple routine that saves you from unexpected breakdowns and costly replacements.
Sharpening and Calibration
Sharp tools cut better and safer. I sharpen blades, snips, and files regularly using whetstones or sharpening systems. Similarly, I calibrate measuring instruments like calipers to maintain accuracy.
This attention to detail might seem tedious but it pays off by improving the quality and consistency of your work.
Proper Storage Solutions
Organizing your tools not only keeps your workspace tidy but also protects your investment. I use wall-mounted racks, padded cases, and dedicated drawers to store tools safely.
Keeping them dry and away from corrosive environments prevents rust and damage. A well-organized shop makes it easier to find what you need quickly, which keeps creative momentum going.
Closing Thoughts
Mastering metalwork requires the right tools combined with patience and practice. Investing in quality equipment not only improves precision but also makes the creative process more enjoyable. From fine soldering irons to sturdy vises, each tool plays a vital role in achieving professional results. Remember, consistent care and safety habits will keep your tools reliable for years to come.
Helpful Tips to Keep in Mind
1. Always match your tool choice to the specific metal and project to avoid damage or poor results.
2. Regularly maintain and sharpen your tools to ensure smooth operation and safety.
3. Use proper lighting and magnification to reduce eye strain and improve detail work.
4. Prioritize safety gear like gloves, eye protection, and respirators to protect yourself during all stages of metalworking.
5. Organize your workspace to streamline your workflow and keep tools easily accessible.
Key Takeaways for Successful Metalworking
Precision and safety form the foundation of quality metalwork. Selecting the right tools, such as fine-tip soldering irons and calipers, enhances accuracy and craftsmanship. Consistent maintenance, including cleaning and sharpening, prolongs tool life and performance. Equally important is adopting a safety-first mindset with proper protective gear to prevent injuries. Lastly, a well-organized workspace not only boosts productivity but also fosters creativity, making every project more rewarding.
Frequently Asked Questions (FAQ) 📖
Q: uestionsQ1: What are the essential metalworking tools every beginner should have?
A: For anyone just starting out in metalworking, it’s crucial to build a basic toolkit that covers the fundamentals. This typically includes a quality set of hammers (like ball-peen and cross-peen), a sturdy anvil or bench block, various pliers, metal files, a hacksaw, and a reliable measuring tool such as calipers or a ruler.
From my experience, having these basics allows you to practice shaping, cutting, and finishing metals effectively before investing in more specialized equipment.
Starting with these tools helps you understand the material better and develop your skills gradually.
Q: How do I choose the right metalworking tool for a specific project?
A: Choosing the right tool depends largely on the metal type, the complexity of your design, and the finishing you want to achieve. For example, if you’re working with softer metals like copper or aluminum, lighter hammers and finer files work best to avoid unwanted dents.
For harder metals like steel, heavier-duty tools such as power shears or angle grinders may be necessary. In my projects, I always evaluate the metal’s properties first and then match them with tools designed for precision or durability as needed.
This tailored approach ensures cleaner results and less frustration.
Q: How can I maintain and care for my metalworking tools to prolong their lifespan?
A: Proper maintenance is often overlooked but makes a huge difference. Regular cleaning to remove metal shavings and dust, keeping tools dry to prevent rust, and sharpening blades and cutting edges frequently are key habits.
I’ve noticed that applying a light coating of oil on hammers and pliers after use prevents corrosion and keeps them functioning smoothly. Also, storing tools in a dry, organized toolbox reduces damage and makes your workspace more efficient.
Taking these small steps not only extends the life of your tools but also improves your overall crafting experience.